|
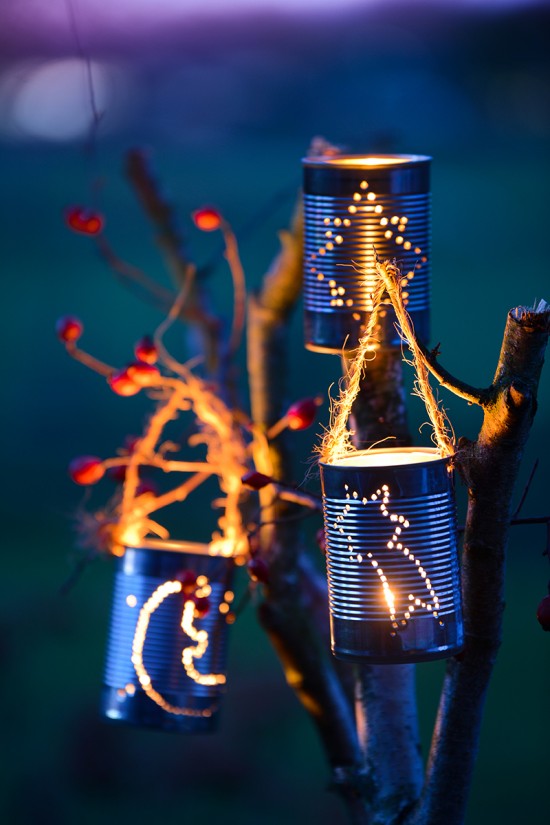
There are many fun and unique ways to upcycle a tin can. One of the most popular tin can DIY projects at the moment is turning an old tin can into a beautiful indoor or outdoor lantern.
A tin can lantern is essentially a tin can with a punched-out pattern of holes on its surface, decorated according to your heart’s desires. Creating a tin can lantern is an easy project that even a new DIYer can do. Though some of the steps should be carried out by an adult, there are many ways to involve kids in the process as well.
 Here’s how you do it: Here’s how you do it:
Step 1 – Prepare your tin can
First you’ll need to select a tin can that has been opened on one end, remove any labels, and give it a thorough cleaning. Next you’ll want to fill the can up with water and let it sit in the freezer over night. The ice will allow your tin can to hold its shape while you punch out your design.
Step 2 – Prepare your design
While your can is freezing you can prepare your design. Cut a piece of paper so that it is large enough to fit around the circumference of the can and draw any design you’d like, keeping the lines simple and clear. Popular designs include a flower, a sun, a leaf, or a star. Once you’ve drawn your design, you need to draw a series of small, well-spaced dots along your lines. These dots mark where the holes on your tin can are going to be.
Step 3 – Overlay your design and punch out your pattern
Remove your tin can from the freezer and overlay your template on its surface, securing it to the can with masking tape. Using a hammer and a nail, punch out the pattern of holes that you drew on your design. You might even want to use differently sized nails to create differently sized holes for a bit of extra visual interest. Once you’re all finished just remove your design, tip out the ice, and admire your handiwork!
Step 4 – Get creative!
While a tin can lantern can be striking when simply left as-is after you’ve finished punching out the holes, you can get a little creative with color and other decorative elements. For example, you can attach metals beads with metals wires to the outside of your can. You can even spray paint your tin can any solid colour you like, or utilize masking tape to add many different colours to the outside of your can.
Step 5 – Place a tea light inside
The finishing touch to any lantern is, of course, the light inside. A nice, small tea light should do the trick inside of a tin can lantern, as it won’t produce too large of a flame. Nevertheless, you’ll still need to be careful about where you place your lantern, and you’ll have to supervise it when it’s lit. A good alternative to a real flame is a battery operated LED tea light.
With your tea light inside, your beautiful new decorative piece is all set to add to the ambience of any indoor or outdoor space in your home. If your love how it looks and you had a fun time making it, why not make several more?
|


